| |
How to Fold an
8-Pointed Origami Star
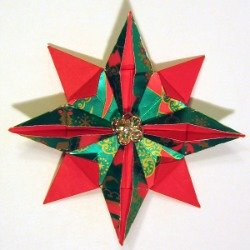 This beautiful traditional origami star is also known as the
sunburst star. This beautiful traditional origami star is also known as the
sunburst star.
It's made of two interlocking units and is equally beautiful on both
sides.
Double-sided paper (colored on both sides) is ideal.
For this red and green star, I laminated foiled wrapping paper to two
pieces of plain red origami paper.
Click
for lamination instructions.
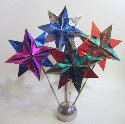
After making the star, I added an old pierced earring to the
center. Two individual beads, one on each side, looks nice, too.
 You can have fun making this star from a variety of sizes,
colors, and types of
paper, and then embellishing them with glitter and beads. You can have fun making this star from a variety of sizes,
colors, and types of
paper, and then embellishing them with glitter and beads.
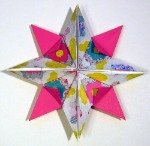
I made this pink origami star as a special gift for a friend. I photographed her treasured heirloom quilt, and then
cut a square from the printed photo. >
Materials
- Two pieces of square paper, any size, but both
the
same size. Double-sided is ideal.
- Quick-drying
adhesive or any white craft glue
(optional)
- Glitter spray (optional)
This star and the fancy beaded version are available as classes, too.
Click for info.
|
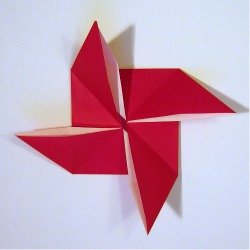
1.
Fold each piece of paper into a pinwheel
base.
Tip: If you
are using double-sided paper - for example, two pieces that are
green on one side and red on the other, begin folding one green side
up, and the other red side up.
|
|
|
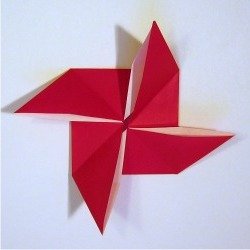
2.
Crease the triangular flaps in
the
other direction.
|
 |
|
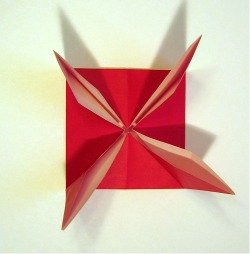
3.
Stand the triangular flaps up.
|
|
|
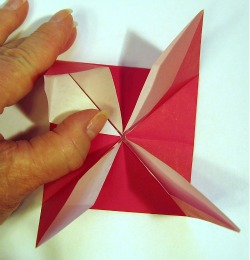
4.
Open one like a mouth and then...
|
|
|
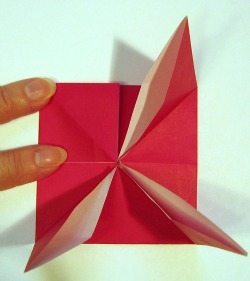
5.
Squash-fold it into a little
square.
Tip: If you
have trouble with this step, you might find it helpful to review the
instructions for the square
base, beginning at Step 10.
|
|
|
6.
Repeat with the other three
triangular flaps so that you have four little squares.
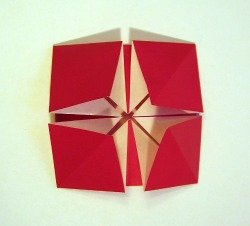
Tip: If
you've folded an origami crane, these squares should look
familiar. You are going to fold each of them like half of a crane base.
|
|
|
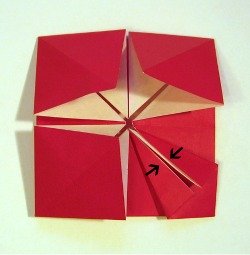
7. Fold two inner sides of a square to
the center line, forming a kite shape.
|
|
|
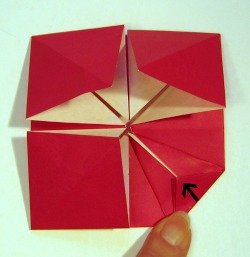
8.
Fold the triangle at the top of
the kite down.
Crease well.
|
|
|
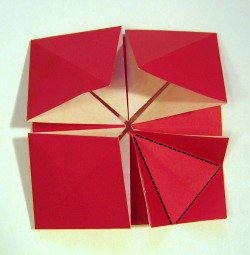
9.
Unfold back to the square.
Note the triangular crease pattern you made.
|
|
|
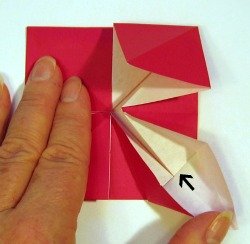
10.
Starting in the center of the
piece, peel up the top layer and fold back on the crease you made in
Step 8 (at the arrow).
|
|
|
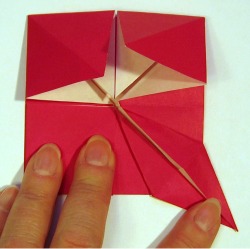
11.
Collapse the sides in on the
existing creases, forming a diamond shape.
Tip: If you
have trouble with this step, I suggest you practice folding a crane base.
|
|
|
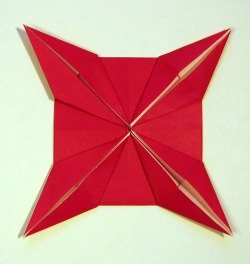
12.
Repeat Steps 7 through 11 on the
remaining three squares.
|
|
|
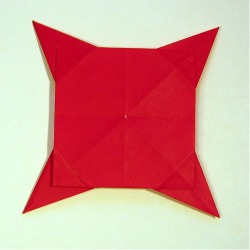
13.
Turn the model over.
|
|
|
14.
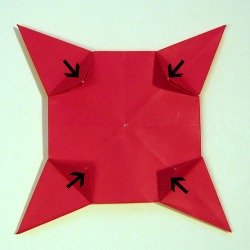
Fold the four little triangles
toward the center.
Crease well.
This completes one of the two units.
Fold the second unit from the other pinwheel base.
|
|
|
15.
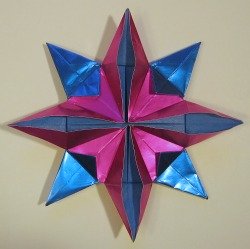
Place the two units together,
back to back, and use the little triangles to lock the pieces together.
Be sure to use all 8 triangles, 4 on each side.
Spraying a star made of regular origami paper with glitter spray works really well and
helps the star hold its shape.
|
 |
|
16.
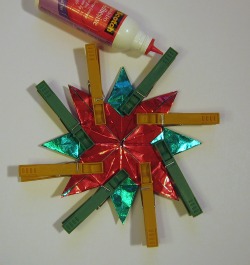
If you want, you can glue the
two pieces together by putting a drop of glue under each of the 8
triangles (4 on each side).
I use clothespins as clamps while the glue dries.
Enjoy your origami star. It makes a great gift, too!
|
|
Back to top of Origami Star
Browse
the
Origami Model Library
All About
Origami Home

|


 This beautiful traditional origami star is also known as the
sunburst star.
 You can have fun making this star from a variety of sizes,
colors, and types of
paper, and then embellishing them with glitter and beads.