How to Fold an
Origami
|
 Many
favorite origami
models begin
with the square base, including the famous crane.
Many
favorite origami
models begin
with the square base, including the famous crane.|
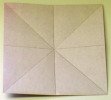
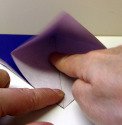
Task 1: Make “helper creases.” Your first task is to make your paper have the creases shown here. 2. Fold the right side to the left side, forming a rectangle. 3. Crease well and unfold. 4. Fold the bottom edge to the top edge. 5. Crease well and unfold. 6. Fold a corner to the opposite corner, forming a triangle. 7. Orient it with the fold away from you. 8. Fold the triangle in half, forming a smaller triangle. If you let go of it, the top triangular flap might pop up like this. > And, if you were to completely unfold it now, you would see the creases shown in the first photo. |
|
|
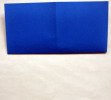
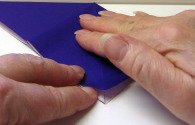
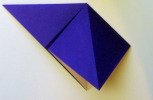
Task 2: Complete the first side of the base. 10. Working with the top flap, open it so you can work inside it. 11. Hold the points together with your left index finger. 12. Slide
your right index finger all the way up into the top. 13. On the outside, squash the paper down to form a square.
Be
careful not to form any new creases.
Only use the helper creases made in Task
1. Your model should look like this.
|
     |
|
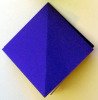
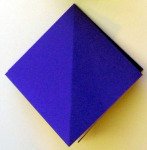
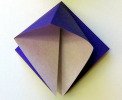
Task 3: Complete the second side of the base. 14. Turn the model over. 15. Flip the triangular flap all the way to left and crease again along the existing center crease. This makes the next fold easier. 16. Lift and open the triangular flap. 17. Squash-fold another square just like you did on the first side. Refer to back to Steps 10 through 13, if needed. The completed square base.
If you came here from other instructions on this site, please click your browser's Back button to return.
|

|